

Welcome to Sidhe Bowtique, run by us Sylveon, Nymphleona and Meechietye. Here we show you how to make all sorts of upcycled, recycled, and handmade crafts and projects.
Hey, Ambitious Arts and Crafters!! Send in your finished projects you've tried from Sidhe's Bowtique by emailing us a picture at pokemon.trainers@gmail.com so we can post it here!
Tornado in a Bottle
Supplies:- Empty plastic water bottle, cleaned out with no label
- 3 tbsp glitter color of choice
- Funnel
1. Using the funnel, add the glitter into the empty bottle.
2. Fill the jar 3/4 full of water, and put the lid back on really tight.
3. Turn the bottle upside down, quickly move the bottle in a circular motion for about 10 seconds or so, and then set the bottle down to observe your tornado.
Keep repeating step number 3 until you get a tornado spiral to show up. You will get there! When you spin water in a circular motion it creates a water vortex that looks like a tornado. This force that causes the water to spin around the center of the vortex is called centripetal force.
Decorate Your Own Journal
Celebrate the thoughts that are important to you in your very own decorated journal.
Directions:- 17 x 21 in. of your favorite pattern of fabric
- 7.5 x 9.75 in 100 pg. composition book
- Fabric glue
- Fabric Pen, your favorite color
- Ribbon (minimum of 10 mm thick)
- 10 mm or smaller self-adhesive velcro circles
- Self-adhesive flowers, gems, or scrapbooking add ons
1. First, take your fabric and cut it into 16 inches by 20 inches. Open flat the front and back cover of the notebook and place the fabric over it to make sure it fits. Now cover it, tucking the excess into the underneath of the front and back cover.
2. Close the book, making sure you can still open and close it with ease. Cut a slit in the top and bottom of the fabric where it meets the binding. Tuck the excess into the cover. Check again to make sure it looks good. Now begin to use the glue to adhere the inside cover to the excess fabric. Make sure no extra pokes out. Leave it upright and open to dry.
3. Now take your thick ribbon and, starting at the middle of the book horizontally, place it all the way around with about 1-2 inches extra from the back. Any excess from the front can be tucked under the cover. Glue it down. Tuck the ribbon onto itself and glue and add a velcro circle to the side facing up. It will be used as a strap to secure to the front. Test to see how far over it will come and mark it on the cover’s ribbon. Place another velcro circle there. Attach them to make sure they work.
4. Now, get out your fabric pen. Write your name or My Journal or whatever you would like on the front of the book. You can use the pen to make whatever designs you would like. There is a wide variety of fabric pens available, in a variety of colors, including metallics. You can even add glitter glue. Personalize it, make it yours.
5. If you have self-adhesive flowers, gems, or scrapbooking add ons, add them now. Go nuts making this book one-of-a-kind!
6. Now it is time for your first entry! What will you write about?
Upcycled Pokémon City/Town Map
Supplies:- Solid color door mat or placemat (cleaned in the washing machine)
- Felt in lots of colors
- Black duct tape
- Color tape
- Permanent markers
- Scissors
- Heavy duty glue/hot glue
1. Start making your city or town by making roads on your mat with black tape. Add thin yellow or white tape to the middle of the roads to simulate lanes and make it look like a road even more.
2. Next add some buildings. Cut out your felt into different shapes to make a Pokémon Center, PokéMart, gym, houses, and whatever else you think your town or city needs.
3. Place your buildings' layers on the mat. When you're happy where they are, glue them down. Tape extra features you need, such as extra colors or signs to be filled in with words(permanent marker).
4. Add bushes, trees, and water. Glue down when you're happy where you've placed them.
5. Lastly, add Pokémon figurines. Enjoy your new Pokémon town or city!
Grow Your Own Crystals
Supplies:- Fishing line
- Small cotton balls
- 3-4 tbsps borax
- 3 cups water
- food coloring
- popsicle sticks
- mason jars
1. Bring water and borax to a boil. Let cool. Transfer to jars until three-quarters of the way full.
2. Add your favorite color to the jars and stir.
3. Tie fishing line around cotton balls. With only a couple inches of line, tie the other end of the fishing line to the popsicle stick.
4. Drop the cotton ball in the water in the jar. Place the popsicle stick over the rim of each jar so that cotton ball is suspended in water, not touching the sides.
5. Leave the crystals alone now for the next couple days. The longer you leave them, the bigger the crystals will grow. Be sure not to bump the glass; these are fragile.)
6. Remove the crystals from the jar, and hang the crystals to dry. You may slide the line off of the popsicle stick and hang them or trim the line off. Remember the crystals will still be brittle (fragile & prone to breaking.) Share with us your results!
Nebula Jars
What is a nebula? According to NASA, a nebula is a giant cloud of dust and gas in space. Some nebulae (more than one nebula) come from the gas and dust thrown out by the explosion of a dying star, such as a supernova. Other nebulae are regions where new stars are beginning to form.
Supplies:- Mason jar/cleaned recycled jar & lid
- Acrylic paint (2 colors)
- Cotton balls
- Glitter
- Popsicle sticks or chopsticks
- Water
1. Fill 1/3 of the jar with water. Add several drops of one paint, put on the lid, and shake.
2. Add a bit of glitter to the water.
3. Stretch out some cotton balls. Add them to the water until the bottom is filled with cotton. Use the popsicle sticks or chopsticks to press them down into the water.
4. Now fill another 1/3 of the jar with water. Adding the contrasting paint color, stirring in to mix. Repeat steps 2 and 3.
5. Finally, fill the last 1/3 of the jar with water. And repeat steps 2 and 3 again. You are all done. Enjoy your nebula!
Let's Make Elephant Toothpaste!
Learn about exothermic reactions with this cool back-to-school project! It releases heat as a byproduct of the chemical reaction when hydrogen peroxide breaks down into water and oxygen (it's two main ingredients, as hydrogen peroxide is just H2O2). Dish soap traps the oxygen produced during the reaction, creating a lots of foam. Fast-acting yeast is a catalyst, speeding up the decomposition of hydrogen peroxide. The reaction between the chemicals generates lots of heatin the bottle. Be sure to wear gloves and googles or glasses to be safe.
-
Supplies:
- 4 oz 3% or higher hydrogen peroxide
- A squirt of dishwashing soap
- A few drops of food coloring
- 2 TBSP warm water
- 1 tsp fast-action yeast
- Glass oven dish
- Funnel
- Bowl for mixing yeast
- Spoon
- Safety glasses and gloves
1. Make sure you have on your safety glasses and gloves at all times. Use a clean and dry empty 16 oz plastic bottle. Put it in a glass oven dish to catch overflow.
2. Have an adult help you pour the hydrogen peroxide into the bottle using a funnel. Then, careful not to drop, remove the funnel and wash it in a sink.
3. Add a squirt of soap and food coloring to the bottle.
4. Attach lid back on and gently shake to mix.
5. In another container, stir fast-acting yeast and warm water til well mixed.
6. The chemical reaction will happen quickly once you pour the yeast mixture into the bottle—so once you pour it in, move away and watch it grow!
Autumn Art Project
-
Supplies:
- brown or gray construction paper
- poster board
- assorted colored leaves
- assorted seeds, acorns, pinecones grass
- extra strength glue
- markers
1. Cut your brown or gray construction paper to the shape of a tree trunk and glue it to your poster board, the wide roots at the bottom of the page, and the branches reaching up.
2. Cover the branches of your tree with all your leaves, gluing them down when you are happy where you have placed them.
3. Lay the grass on the bottom to make it look like grass.
4. If you would like make a design with all the different seeds and nuts. Put them in the tree, the grass, the sky. Glue them down when you are satisfied with their placement. Make it as abstract or realistic as you want. This is your art project. This is your world.
5. Finish off your picture with some markers. You can draw a sun or animals. You can outline things. You can color a background, shade things, make shadows or show weather in the background. Feel your emotions as you feel each color.
6. What does your amazing Autumn Art Project look like? Like autumn the natural elements of your picture will turn brown and fade eventually, but the feelings you hold in your memory of making your work of art doesn't have to fade! Take a picture of your project so you can always remember what it looked like when it was fresh. And remember that you can repeat it every year, with new colors and new designs.
What is Oobleck?
Oobleck is a non-Newtonian fluid, which means it's viscosity changes depending on pressure. Viscosity is the measure of friction in a liquid and determines how fast a liquid flows. Most liquids have a consistent viscosity, but oobleck on the other hand does not. It has the properties of both solids and liquids. Squeeze it and it feels solid; let it sit in your hand and it'll drip like a liquid. In chemistry, oobleck is known as a colloid, a substance in which the small particles of one substance are dispersed throughout a substance in which the small particles of one substance are dispersed throughout another substance, but not chemically bonded.
Supplies:- 2 cups cornstarch/cornflour
- 1 cup water
- food coloring (optional)
1. Pour two cups of cornstarch in a bowl. Add water and combine.
2. If you opt for color, add your food color in now and stir.
3. Now you should be able to pick up your oobleck with your hands and play with it. If your oobleck is too watery, mix a couple tablespoons of cornstarch in. If it's too solid, mix in a couple tablespoons of water.
*When getting rid of oobleck after play, do not wash down the sink. This can cause a clog. Simply wait for it to dry and dispose of in the trash or vacuum up any oobleck dust.Solar Oven
Supplies:- Box with a flip top (such as donut, shoe, or shipping box)
- Scissors
- Ruler
- Tin Foil
- Plastic wrap
- Tape
- Wooden skewer
- Hot glue and hot glue gun
- *Food to cook like s'mores or English muffins. Or reheat pizza or warm up pie or cookies.*
1. Use a ruler to mark the top of your box with lines for cutting a window. Leave enough space along each box edge to attach your plastic wrap.
2. Cut the lid on the lines to create a flap on three sides. Fold back the flap on the lid so it's sticking straight up.
3. Get our your aluminum foil. Line your box's inside with foil. Tape more foil to the underside of the flap that's sticking straight up.
4. Next, take plastic wrap over the lid's opening.
5. Now, with adult supervision, take your skewer and hot glue it to the lid to lean against the flap and keep holding the flap up so it will reflect the sun's light.
Put your food of choice inside the box. Close it and place it in a very hot, sunny spot, facing the sunlight. Make sure the flap is up.
Which snack did you choose? How long did it take to cook? What improvements might you make to your Solar Oven if you had different resources?Let's Make Slime
Supplies:- Clear or Glitter Glue
- 1/4 cup Borax (sodium tetraborate)
- 1/2 cup water
- Two popsicle sticks, for stirring
- Two bowls
1. In one bowl, stir about 1 oz of glue with 1/4 cup water. In another bowl, add 1/4 cup of borax with 1/4 cup water. Stir until completely combined.
2. Add the borax mixture to the glue mixture and stir together. Now, with clean hands, pick up and knead it together with your hands until it gets less and less sticky. If there is a lot of excess water, simply pour it out.
3. When you're going to use your slime, clean your hands and workspace first to prevent introducing bacteria into your slime. Seal into an airtight bag and leave in the fridge when not in use to prevent harboring bacteria.
*Glue has an ingredient called polyvinyl acetate, which is a liquid polymer. The borax links the polyvinyl acetate molecules to each other, creating one large, flexible polymer. This kind of slime will get stiffer the more you play with it, meaning it won't maintain its ooey-gooey slime-like quality for long.*
Volcanic Eruption
Supplies:- Quick air-dry clay
- Paints (such as gray, for your volcano)
- 2 tbsp baking soda
- 1/2 cup white vinegar
- 1 cup warm water
- 3-5 drops dish soap
- 3-5 drops red food coloring
- funnel
- deep baking sheet
(Before you start, make sure to wear eye protection. Do this experiment with adult supervision.)
1. Shape your air-dry clay into a volcano shape, making sure to crimp the bottom with no holes for the lava to seep out of. Make sure you make the vent big enough to pour the ingredients in later for the eruption. Follow the directions on the package for drying/hardening. This part may take days to dry.
2. Once dry and hardened, paint your volcano whatever color you'd like, such as gray or brown, or add streaks of red inside coming from the top vent. Wait for the paint to thoroughly dry.
3. In a cup, mix 1/2 cup vinegar with 3-5 drops of food coloring. Add 3-5 drops of soap and 1 cup warm water. Mix.
4. Place your volcano on the baking sheet. Using a funnel, add 2 tbsp baking soda to the inside of your volcano.
5. Quickly pour the colored vinegar mixture into the vent of your volcano. Watch it what chemical reaction happens when baking soda and vinegar meet!


Upcycled Treasure Box
Make your own special treasure chest for your favorite items.
Supplies:- recycled shoe box
- Mod Podge
- your favorite pictures from magazines, printed out, or drawn
- Matching color of felt
- Fabric glue
1. First, cut out your favorites pictures, such as pictures from a magazine, your favorite Pokémon you've found online, or pictures you've drawn and colored.
2. Next, paint the Mod Podge all over the shoe box. While it's still wet, layer your pictures all over it like a collage.
3. After it is completely covered with pictures, set it aside to dry.
4. Now, measure out the inside parts of your box (the bottom, the sides, and the top.) Trace the shapes onto felt with a black marker.
5. Finally, cut the felt out, and glue the pieces to the inside of the box where they line up. Keep the lid open to air dry.
What will you store in your treasure box?
Recycled Crayons
Ever wonder what to do with a bunch of little broken crayons? Instead of throwing them away, you can give them a new lift with this recycled crayon project!
Supplies:- Broken crayons
- Silicone molds
1. First, gather your broken crayons and begin peeling the paper off of them. If the paper is giving you a problem, try soaking them in some soapy water and the paper should come right off.
2. Next, organize your piles of colors by similar colors/shades. This will yield the most consist colored crayons. However, you can also make dual or rainbow-colored crayons in bigger molds and it might be fun too.
3. Now break your crayons into small pieces, as small as possible, so that they will all fit into whatever molds you have picked out. If you can't break them enough with your hands, ask an adult to help you to cut them up with a knife. Gather all the chunks by color, and fill up the mold to the top.(Don't use mold with tiny details as this will be difficult to remove and will break off again when trying to color.)
4. With an adult's help, turn the oven on, put your molds on the oven rack, and cook your crayons at 275 degrees Fahrenheit for 30 minutes or until completely melted.
5. With adult help, carefully remove the crayon molds from the oven, paying heed not to spill the liquified crayons.
6. Let the crayons cool off and solidify again. If you're not patient enough to wait, you can put them in the refrigerator or freezer to speed the time up.
7. Finally, when completely cooled, pop out your crayons and test out your brand new colors!
Don't have time for this project, but still have a lot of broken crayons? Consider donating your crayons to The Crayon Initiative

Calm Bottle
A Calm Bottle is for helping to cope when you're having big feelings or calming down when you�re very upset, sad, or scared. Make your own special Calm Bottle you can use whenever you feel overwhelmed.
Supplies:- Water bottle (emptied, with the label removed, cleaned out well)
- Hot water
- Bottle of clear glue
- 1-3 teaspoons of your favorite glitter color
- Food color in your favorite color
- Beads, sequins, small Lego pieces, tiny glow-in-the-dark plastic figurines, shiny or fluorescent hard toys that will hold up in water and fit in your jar
- Strong glue (like super glue)
1. Start by filling your cleaned water bottle a little less than 3/5 full with hot water.
2. At this point, add your beads sequins, Legos, toys or plastic figurines, making sure you don't add too many. You'll still need to add glue, so make sure you don't over stuff your bottle with goodies.
3. Add glitter.
4. Add a few drops of food coloring, if desired.
5. Fill the rest of the bottle with clear glue, leaving an inch at the top. Cap it and shake everything up. If you want more items in it, now is the time to add it. If you want the glitter to fall slower, add more glue. If you want the glitter to fall faster, add more water. If you want more glitter, or another color, do it now and test the results.
6. Once you have your calm bottle the way you'd like it, use your super glue on the lid and screw it shut. Shake it up and watch it work it's sensory magic!
Pokémon Snow Globe
Supplies:- mason jar or thoroughly cleaned out clear plastic jar
- glue
- Favorite Pokémon figurine
- beads, mini shells, or cabochons (optional)
- 2-3 teaspoons of glitter
- a few drops of vegetable glycerin
- cold water
1. Inside your cleaned out plastic jar or mason jar, use strong glue to attach your Pokémon figurine to the inside of the jar's lid. Wait for it to thoroughly dry before attaching to the jar in step 6.
2. Fill the jar with cold water.
3. Add 2-3 teaspoons of your glitter color of choice. Stir.
4. Add some beads, sequins, mini shells, or cabochons now to match the theme of your snow globe.
5. Add a few drops of vegetable glycerin.
6. Add glue to your lid and firmly reattach the lid on the jar. Now, shake it up and watch it snow!
Pom-Pom Pokémon Art
For this 3D art project, show your love of fluff and stuff with your artistic side!
Supplies:- Light-weight Paper
- Cardboard (same size as paper)
- Colored pencils, markers, crayons, and/or acrylic paints
- Colored Pom-Poms/cotton balls
- Glue
- Paintbrushes
- Print out of your Pokémon of choice
- Newspaper (for paint spills)
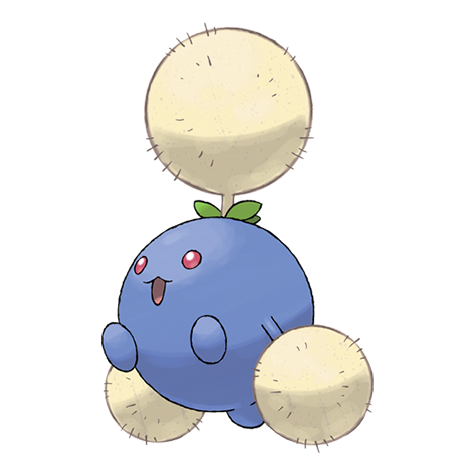
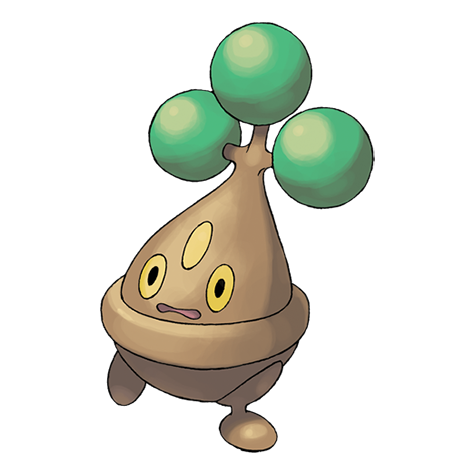
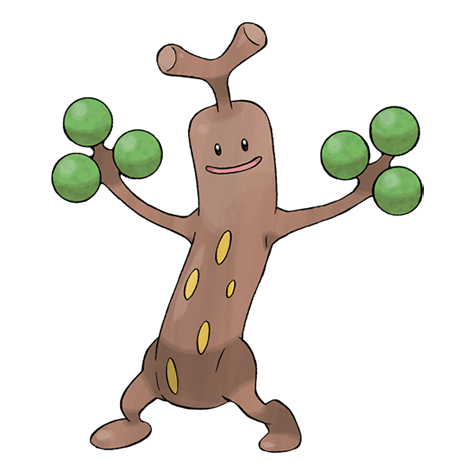
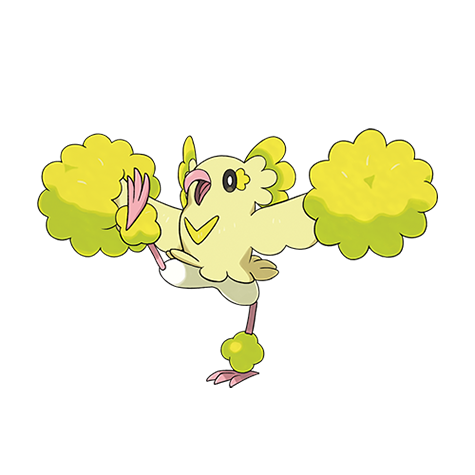
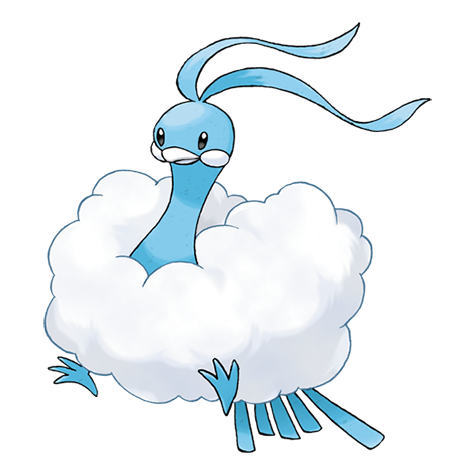
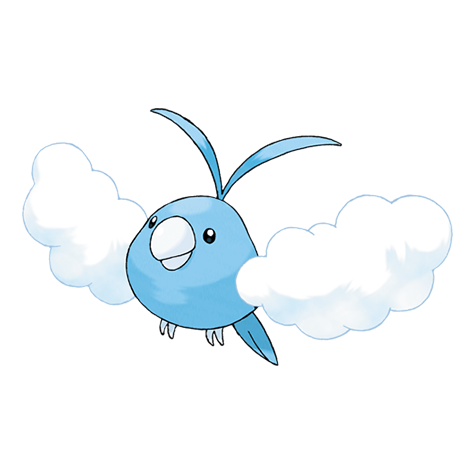
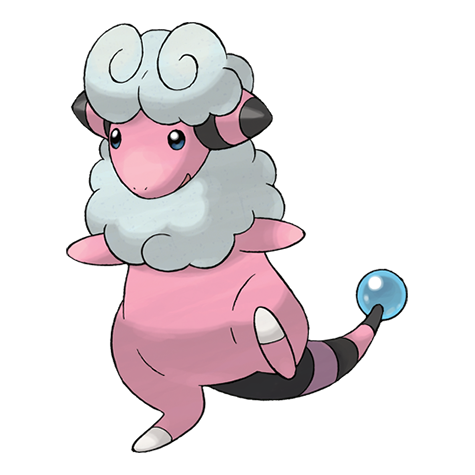
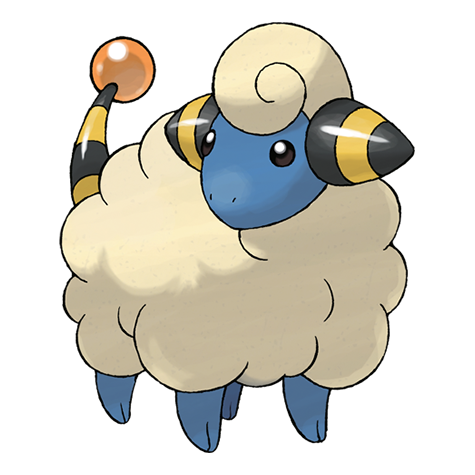
1. Pick out which fluffy, pom-pom Pokémon you'd like to do. Google pictures of easy, forward-facing pictures of a Pokemon that fits in this category. Examples might be Jumpluff, Bonsly, Sudowoodo, Oricoio, Swablu, Altaria, Mareep, and Flaafy. When you've found a decent picture (try to enlarge it to fit the page if you can), print it out as a guide to look at or trace.
2. Set down newspaper under your workspace, especially if you're working with paint, as it can get messy. Draw or trace onto your paper the basic outline of your Pokemon using the guide you printed out, if you can. Draw only the body without the parts where the fluff will go. For instance, don't draw Sudowoodo's fake green "leaves" or ALtaria's fluffy body. You will be filling that in later.
3. Next, outline your picture with black pen or marker when you're confident with the lines.
4. When the outlining is done, use your paints, pencils, crayons, or markers to fill it in evenly with color. Be as creative as you'd like. This is your own project!
5. Now find the matching pom-poms or cotton balls for your Pokemon. Place them where they need to go and see if you like their placement. If you're using cotton balls, such as for Swablu, you'll have to tug at it a bit to achieve a pulled cotton look. Next, gently glue it to your paper and wait for it to dry.
6. Finally, on the back of your paper, spread a few drops of glue to the corners and attach it to the cardboard to make it sturdier. Show off your art to to your friends and family!
Recycled Percussion Instruments
Make some noise with a bunch of recycled percussion instruments!
Supplies:- Used bean, soup, fruit, veggie, and coffee cans
- Balloons, wide rubber bands
- Acrylic paints
- Used Pringles cans
- Used milk and juice jugs
- Used water bottles
- Dried beans, dried rice, popcorn kernels, Pony beads, pom-poms
- Acrylic paints, Duct tape
- Paper plate
- Hole puncher
- 10 Jingle bells
- Pipe cleaners
- Markers
1. With your used bean, soup, fruit, veggie, and coffee cans of various sizes all washed and dried out, we will be making balloon drums. Use paint to decorate the outside of the cans, if you want at this point and wait to dry. Keep in mind the top near the opening will be covered with balloon when we are done.
2. Once your cans are dry, we are going to place a balloon over the opening. To do this we must cut the balloon at its widest point making it semicircle-shaped.
3. Rinse the balloon with water, so that it feels sticky and it'll stretch over the can's top. Use wide rubber bands to hold the balloons in place. To drum, tap chopsticks to a beat against the balloon top.
Recycled Maracas Directions:1. With different containers, such as used Pringles cans, milk and juice jugs, and water bottles that have been emptied and cleaned out, we can test the sound quality of different types of maracas. Not only can you hear which container sounds the best, but you can also determine which material inside to produce the sound will be best for your percussion band. Determine which items you want to use and if you want to decorate and start with that.
2. Paint or use colorful duct tapes to wrap around your cans/bottles.
3. Once your items have dried completely, put a few scoops of whatever you'd like in them to test out their sound. For instance, dried beans in a Pringles can, dried rice in a jug of juice, Pony beans and Pom-poms in a water bottle. Because you can take the lids off, you can always remove the insides and mix them up to achieve the exact sound you want. Test out each instrument by giving it a shake.
Jingle Bell Tambourine:1. For this project, you'll be using a paper plate to make a tambourine. Simply punch 10 holes around the edges of your plate.
2. Cut the pipecleaners 2 inches long. Pull the pipecleaners through each punched hole and twist them around once.
3. Thread a jingle bell to each pipecleaner and finish twisting them into a knot.
4. If desired, use markers to decorate your tambourine. Play your tambourine by rhythmically tapping against it.
Rainbow Celery Experiment
Plants rely on water to grow. The water travels up tubes in the plant called xylems to bring this nourishing liquid to every part of the plant. In this experiment, watch how water is used in photosynthesis by seeing the water move through celery.
Supplies:- 7 stalks of celery
- 7 clear 8 oz. cups
- liquid food dye (red, orange, yellow, green, blue, purple)
- clean water
1. With an adult's help, cut the 6 stalks of celery at the base. Do you notice the tubes? These will be what sucks up the water for the plant!
2. Fill your clear cups with 4 oz. of water. Add dye to each cup, except for the last, which will be your "control" cup. Make a red, orange, yellow, green, blue, and purple cup, adding enough dye to each cup and mixing to make it very colorful.
3. Place one stalk of celery into each cup. What do you think will happen to the water?
4. Now, leave the celery in the cup overnight.
5. When you return, observe what has happened. Have an adult help you cut the celery stalks in half and see what they look like inside.
Did the water level change? What color dye was the best? What happened in the "control" (plain water) cup?
Liquid Rainbow
- About:
For this science experiment, not only will you be creating a really beautiful liquid rainbow, you�ll also be learning about density!
Supplies:- 3 tablespoons corn syrup
- 3 tablespoons maple syrup
- 3 dish soap
- 2 tablespoons sugar + 3 tablespoons water (fully mixed & dissolved)
- 3 tablespoons water
- 3 tablespoons vegetable oil
- 3 tablespoons rubbing alcohol
- liquid (not gel) food coloring
- 7 cups
- a Mason jar or vase
- tablespoon for mixing
- eye dropper (or turkey baster)
1. Pour each liquid in the cups as listed above, paying specific attention that they are all 3 tablespoons, all equal amounts. (You may want to set the cups in the order you'll add them into the container: corn syrup, maple syrup, dish soap, sugar water, water, vegetable oil, rubbing alcohol.)
2. Add different but the same amount of food coloring to sugar water, water, alcohol, dish soap (if it's clear) for contrast of each liquid to stand out. Stir in the food coloring thoroughly. Be sure to write down what color you have assigned to each liquid.
3. Start your column by pouring with an eye dropper/baster the corn syrup into a vase or large mason jar, not touching the sides as you drip the liquid out. It's very important to slowly layer the in the order listed above. Continue in the order listed. Don't worry too much if the liquids mix a little as you are pouring, they will work themselves out because of their differences in density. But, take care with the sugar water and water, as those are mixable.
4. At this point, you should have your whole rainbow assembled. You can choose to carefully put a single artificial flower through the liquid in the vase and display in a window or if it's in a mason jar, you can seal it up and enjoy it in the light. Be careful when transporting it. Though like a real rainbow, it won't last forever, but it can turn out pretty cool with your favorite colors and looks amazing in the light.
Conclusion:Density is the degree of compactness of a substance. Although each substance appeared to be the same amount, they varied in compactness or density. Their density causes them to float or sink, which allows them to rest atop other liquids or sink under other liquids. We also learn that water and oil are never miscible (mixable) because oil is hydrophobic (meaning: "tending to repel or fail to mix with water.") Lastly, because of liquid density, you can even trap solid objects inside this liquid rainbow, which is yet another experiment you an try to test the density of solid objects.
Sidhe (pronounced SHEE) means faerie. Our workshop only features the magical projects! Which one was your favorite?
Thank you for visiting Sidhe Bowtique!


